1 - Getting Started with Apache NiFi
Getting Started with Apache NiFi
Objectives:
- Learn about history of NiFi
- Install NiFi
- Start up NiFi for first time on local machine
NiFi Overview:
The project was created by the United States' infamous National Security Agency (NSA) and had the codename "Niagarafiles". In 2014 the NSA released it as open-source software. The primary developer of the project so far has been Hortonworks who are also well known for Hadoop and their suite of data science software.
At its core, Apache NiFi is used to manage data flow. This means that its job is to take in data, process it, then send it along to another destination. Think of it as a mail service for data. One of the advantages that it has is that uses a web based interface that is simple and allows users to manage the data flow in real time.
Installing NiFi:
I am installing NiFi on my Windows 7 PC, installing it on a Mac or Linux OS will follow a different procedure. Also of note: We will be using NiFi 1.4.0 (Released October 2, 2017).
Windows 7 install:
1) Go to this link: http://nifi.apache.org/download.html and click the link for "nifi-1.4.0-bin.zip" under 1.4.0<-Binaries. The site linked to above is main website for all things NiFi. It has various pages of documentation, project information, and how to get involved in development.

2) This will open all the mirror links for downloading a .zip file with apache nifi in it. Select the top link, and the nifi-1.4.0-source-release .zip file should download.
3) Next, you will need to extract the files in the .zip file. You will need to know where these files are, so I recommend creating a folder specifically for the extracted files. We will also be accessing it via the command prompt, so I would recommend using a short file path on the C:/ drive to avoid having to type too many commands into the command line.
4) Now that you have the folder extracted, open it up and you will see several .bat files. Running these .bat files is how we will start manage the instance.
 |
| NiFi bin folder in Windows Explorer |
Next we will start NiFi on our local machines. Before we do this, you need to make sure you have Java installed on your computer. If you are unsure, go here to download the Java Runtime Environment (JRE): http://www.oracle.com/technetwork/java/javase/downloads/jre8-downloads-2133155.html
Connecting to Local NiFi instance:
In order to run the .bat or batch files in the nifi-1.4.0 bin, we are going to use the Command Prompt. You can access this in Windows by pressing start and searching for "cmd".
Once you have that open, use the choose directory command or "cd" to navigate to the bin folder of the nifi-1.4.0 folder. Once you are there, you can simply type in the name of the batch file you want to run.
To start the instance up, type run-nifi.bat and press enter and a large block of text will appear.
 |
| Run command in a Command Prompt |
In order to check up on the status of our instance open another command prompt, navigate to the bin folder, and type "status-nifi.bat" and press enter. It may take a few minutes to get started, but eventually the output of the status command will say that NiFi is running.
 |
| Status command being run on the left, running NiFi instance on right |
Next, we can open a web browser and navigate to http://localhost:8080/nifi and you should see the NiFi interface as pictured below:
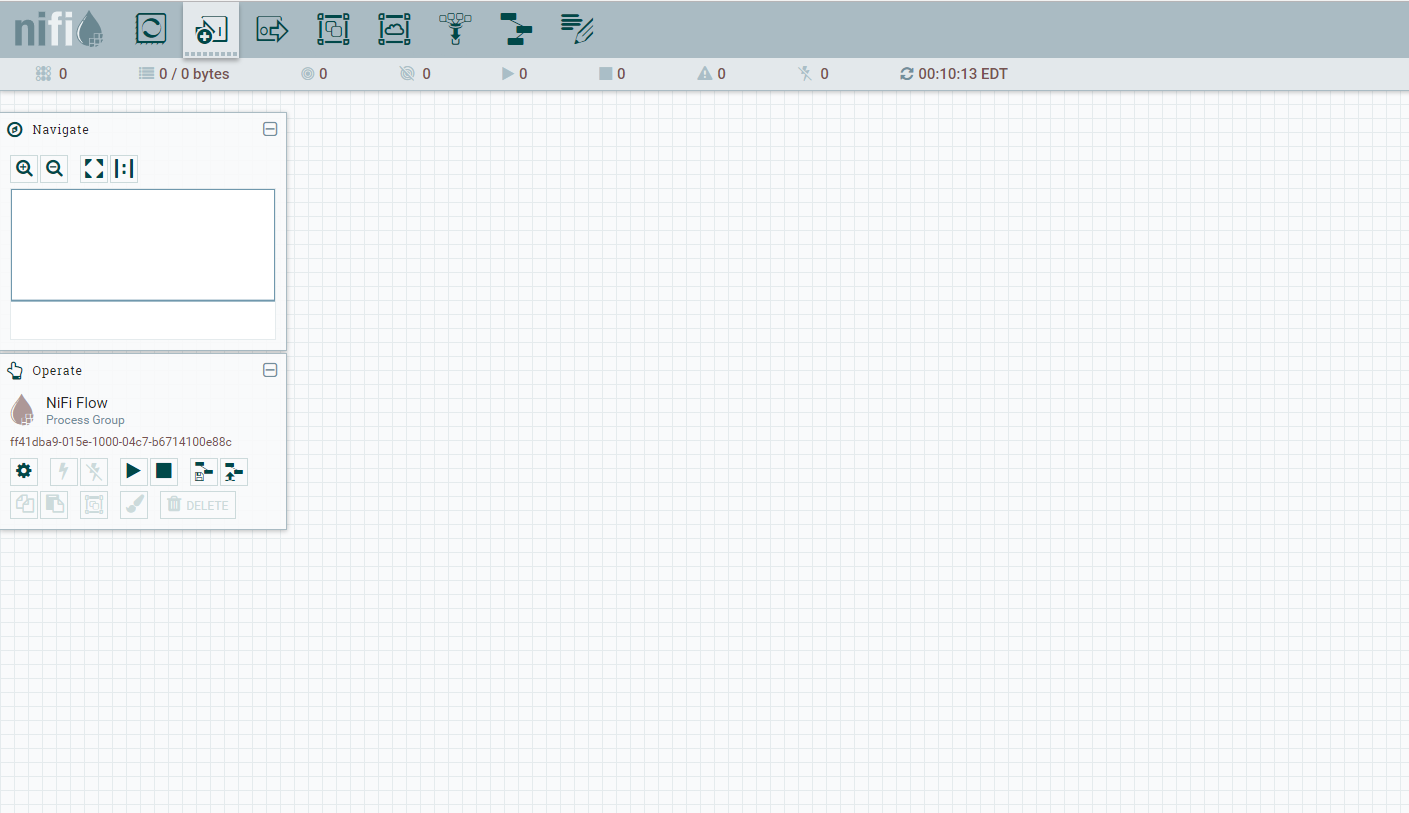 |
| NiFi web user interface at localhost:8080/nifi |
Great! Now that we have that up and running, let's talk about closing it. You may have noticed that there isn't a "exit-nifi" or "stop-nifi" command in the folder. Unfortunately on Windows, NiFi does not run as a service, so the only way it can be stopped is by going into task manager and closing the Java process in the Processes tab.
| Java process in the Processes Tab of the Task Manager |
Going back to the web UI will confirm that it has been stopped. You could also run the status-nifi command again.
Because NiFi is an open source project, a friend of mine recently committed the code to the project to allow NiFi to run as a service on Windows machines. It is currently under review.
Another side note: You may be wondering why we are using the command prompt when one could simply click on the .bat files and run them. The reason is that in the future, should you decide to start NiFi on an AWS instance in the cloud, the generic instance can only be accessed through the Linux terminal, so learning how to use the terminal is valuable. Hopefully this blog will find the time to explore this situation in the future.
Next time:
So, we have fired up our local instance of NiFi and we're ready to rock and roll. Next time we'll be learning about processors, process groups, and the basics of how data flows in NiFi.
If you have any suggestions or questions, leave a comment down below.
Until the next one...
Take it easy, Dude.


I thought your tutorial for running an instance of NiFi was very helpful and thurough and easy to understand. The NiFi interface is very neat and I look forward to seeing how data flows work with NiFi next time and see how you incorporate this concept with using Twitter. I also found it very helpful to understand the background of NiFi and its abilities.
ReplyDeleteI think if I attempted to follow this tutorial with my own installation, the sheer level of detail in your writing would guide me to success. Thank you for your sincere effort.
ReplyDelete